Tuesday, 13 March 2012

Easy to make {pillow cases}

These pillow cases were super simple to make. I scored the fabric at Value village. As  I spied it from afar I thought that it could either be amazing or... really nasty. As I got closer I realized the latter... it was actually leftover fabric someone got rid of... 3 yards of it for only $2.99! I love this fabric and right away knew that I wanted to use if for pillows. Bonus that I ended up finding 2 blank 16x16 pillows still in their plastic wrapping... coincidence?... yes actually :) Just a lucky day I guess.

Pocket pillows are pretty much the easiest to make. I think it took me half hour to make 2 pillows. And the majority of that time was spent measuring and cutting out the fabric, which for some reason took me a long time. Once that is done... you are pretty much finished.


If you are going to make your own pillows and don't mind some different sizes... thrift stores generally have tons of pillows {albeit there are some nasty ones you wanna stay away from...but you can find some good ones too} Instead of washing them, just chuck them into the dryer, with a dryer sheet if you wish, for 20 mins or so to freshen them up{my good friend Rach hooked me up with that little tip...I probably would have tried to wash them and wait for them to dry... dryer = much easier, thanks Rachie!} It doesn't really matter what the pillow looks like on the outside, you are gonna cover it up with your beautiful cases anyways.

OK, so this is what I ended up doing. So for my 16x16 pillow I made my width 16 and the length I made 36 {inches} 16x2=32 and then I just added a few inches to account for the hem you have to do on each side.


1.Cut out your fabric
2. Hem both short ends

At this point you are going to make sure your fabric is going to be "inside-out"
3.Fold the short side just past half way up what will be the middle of the pillow

4. Do the same for the other side, overlapping it onto the first side that you folded up to create the pocket effect.


5.Now all you do is sew up the sides, turn the right side out and stuff your pillow in!! :)


Never buying a $20 pillow again. :p 

Thanks for reading!
{Hannah}

Tuesday, 6 March 2012

Crochet Flower {Baby Head-bands}

I've got a few new "Nieces" that will love these {or their moms will} Thanks to youtube I now know how to crochet flowers {and bows} If you know crocheting basics you will be able to follow along easily. 

Here is the link if you are interested in giving it a go

Here are some of my flowers so far. Some aren't perfect... but practice, practice! Plus it adds character right?! 


Thanks for reading!
{Hannah}

His and Hers {Night-side Tables}

Have you ever wanted to buy JUST a nightstand or night-side table? If you look into it, they can actually run you for a good little chunk of change. I needed one a couple years ago and my boyfriend thought it would be a good idea to get it for me for my birthday. I was shocked to hear that he spent $130 {or he just said that so he didnt have to shop for anything else... hmmm}  on a relatively normal looking one from Leon's that may have even been marked down because of a small scratch. Ever since then I have kept my eye open for how much they actually cost everywhere else and sure enough they are quite pricey. So... I was lucky enough to happen upon 2 of the same side tables {at Bibles for Missions thrift store} for only $12 EACH!! They are perfect size for night side tables and waaaay cheaper {even after buying the paint to refinish them}

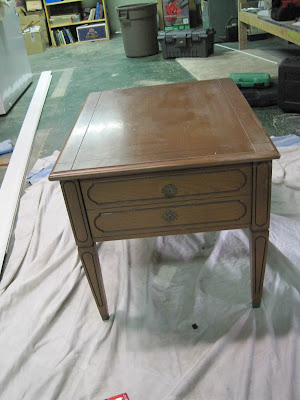
So this is what they looked like when I got them {not entirely bad like that either}


And this is what they became!! I just love them <3 


 So I started by removing the hardware and sanding with a 60 grit sandpaper. They had a pretty thick finish on them. Then I started priming, as you can see its doesn't need to be a neat job {and I didn't do the whole thing with that tiny little brush :s} 


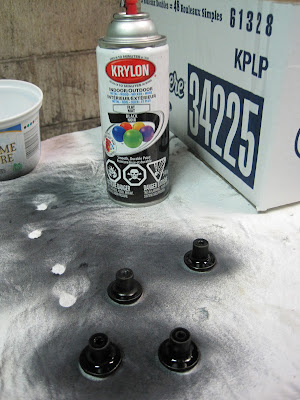
The hardware I spray-painted with Krylon Black Matte finish


Here they are with one coat of primer and one coat of paint. I chose an antique kind of white. You can get cabinet and furniture paint at any Lowe's store. An tint it pretty much any colour you want.


Allllmost done....

Et Voila!


Now the question is... to keep or to sell? 

Thanks for reading!
{Hannah}


Saturday, 3 March 2012

Simple {Sweet Treat} Platters part II

 Yup... I went to the thrift store and got myself some more pretty plates. This particular one is my favorite so far I think. All three plates are a different, but all of them have some gold trimmings on them. I was lucky to find these little gold coloured candle holders as well. The plates were 4 for $2.99 and the candle holders were selling for $3.99 for a set of 3. I also ended up getting a couple other plates and some more candle holders for the bases. Altogether I have 6 beautiful platters to use at my wedding reception.... so far. :}


Theses are the candle holders I selected. I love the pretty pink glass one {favorite}


And the beautiful plates


{TOOLS}


I used a measuring tape and sharpie to determine the middle.


Heavy books to help set them in place


And Advanced instant krazy glue


 This is where that starbucks book that I got really comes in handy 


AND finally.... all done! 


And then since I had something pretty to put them on... I made muffins :}


Unfortunately there was a sad turn of events. Apparently I didn't use enough glue on the top side of this two-tiered platter {yes the one with my favorite candle holder} and It lasted a couple feet off the ground and then  SMASH! now I am unable to get the glass holder off the bottom of the plate. Might have to resort to getting the hammer out. Good to know that if enough glue is used that those puppies aren't moving anywhere though. 


{One day I will get you off of there}

Platter 


 My collection so far. Maybe just a couple more... they are rather fun to make.

Thanks for reading!
{Hannah}